Libraries are useful for archiving
your analytical data and related information. For a guided tour through
available functions around libraries, please review one of the following
topics:
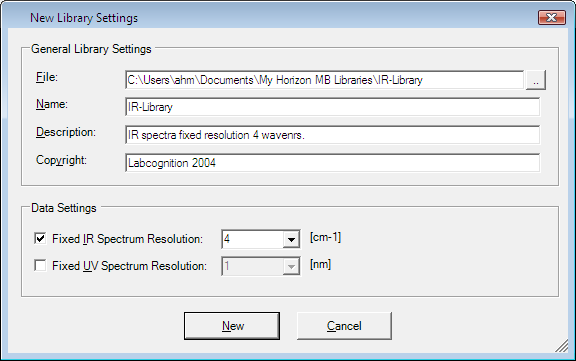
File
and Name
The file name and the library name will be synchronized automatically,
when entering a new file name. The name of the library can be modified
then without changing the original file name file.
Description
You may enter a description for the library optionally. The description
field allows to save some keywords on the main purpose of the library.
Copyright
The owner of a library might enter a copyright label optionally.
Data
Settings
For IR spectra and UV spectra, some special upload conditions can
be adjusted here. The resolution of spectra to be uploaded into this library
will be automatically changed to the selected resolution. This way a library
with comparably low data resolution can be created for optimization of
search speed.
Before you can work with libraries and access data inside a library,
you either need to create one or open an existing library similar to files
and projects. Please follow the steps below to open a library:
From the Library
menu, select the Open... command
or just click the icon in the toolbar of the library
explorer.
In the file selection dialog, select a library
file with the extension *.library
from your preferred hard disc or network location.
Click the Open
button in the file selection dialog to continue.
The library is now connected to the software and a corresponding
node is available in the library explorer tree.
Other library formats are also supported!
Galactic libraries and Nicolet libraries are also supported. If you
need to connect to other libraries, please contact
your software vendor for help.
The library
explorer is the most important tool when working with libraries. It
always provides a good overview over your data and connected libraries.
From this central tool you can create, open and close libraries, add data,
remove data and search data on libraries.
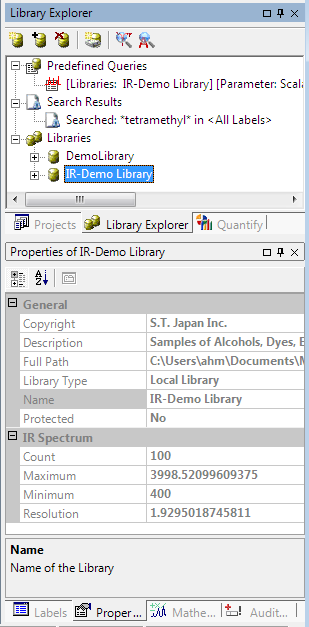
After a library has been created or opened successfully, a new library
node is added to the library
explorer:
Initially, a new library is empty. The properties and some statistical
information about the library can be reviewed in the properties
tab below the library explorer. Herein all information previously
entered during creation of the new library are visible. Additionally,
some statistics about the contents and resolution settings of the library
are shown. For each data type a separate statistic category is available.
For the analyst the default pathway to work with analytical data is
to open e.g. a spectrum of interest in a software, evaluate or manipulate
the spectrum and then save it together with the results either back to
a file or into a library.
There are several ways to insert data into libraries. You can add single
data objects one by one or a batch import can be performed, where data
is located in a particular folder of your file system.
Please follow the steps below to insert a data object into a library:
Open the data object file, e.g. a spectrum you like
to insert into a library.
From the File menu, select the Open
command.
Navigate to
the file location on your hard disc or network and select the file to
be loaded.
Click the Open
button.
Project data is also applicable...
If you have a project
with your particular collection of analytical data to be stored in a library,
you can open the objects in the main workspace from the project as well
by Double clicking with the Leftmouse
button onto the desired object.
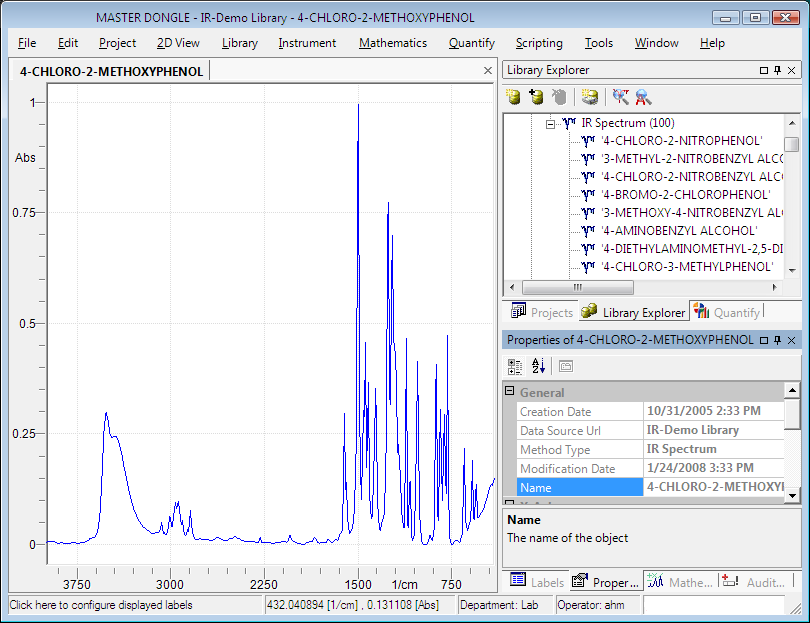
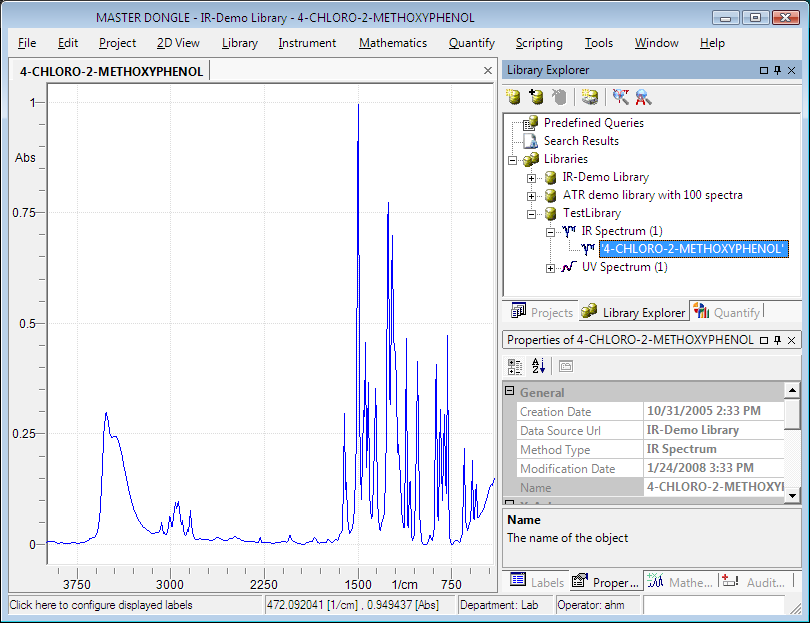
The data object, e.g. a spectrum is now displayed in
the main workspace of the software. In the figure below, an IR spectrum
of 4-Chloro-2-Methoxyphenol is shown.
Properties tab is updated automatically!
You may wonder, why the properties tab on bottom right has changed.
It holds the properties of the opened spectrum now, because the contents
of all tabs on the bottom right will always be updated automatically according
to the current active object in the software. In this case you see the
details about the active spectrum in there.
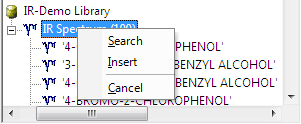
From the Library
menu, select the Insert 'spectrum name'into Library command or use the
keyboard short hand CTRL-SHIFT-I.
The spectrum name available in the menu will be updated automatically
according to the current active data object.
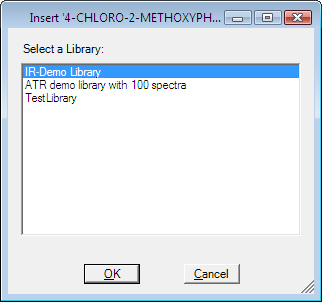
If no destination library has been selected in the library
explorer, a library selection dialog is opened.
From
the library selection dialog,
select the destination library.
Click the OK
button to complete insertion of data.
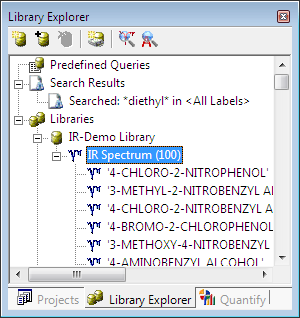
The library explorer tree is updated accordingly. If
you expand the nodes below the 'IR-Library' node, you will see a new category
for IR spectra and below this a new spectrum node for the spectrum which
has been inserted.
Users usually have collected many files with analytical data in one
or more folders and sub-folders on their hard disc or network. The more
files are available the greater the chaos. In order to circumvent loosing
control over your data, you might archive those files from a folder and
sub-folders enclosed into a library just by a single command in the software:
Create a new library
as described above before starting the archiving process (Optional).
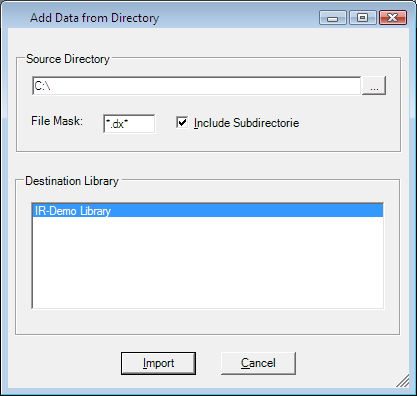
From the Library
menu, select the Import Data from Directory
command or use the CTRL-SHIFT-D
short hand. The following dialog will be opened:
Type the complete
path into the Source Directory
field, where your data files are located or click
the icon to select a path from a dialog.
Type a valid
file mask into the file mask field.
You may import
files by extension.
In this case type e.g. *.dx to import all JCAMP-DX files.
You may import
files by name.
In this case type e.g. MyFile*.* to import all files starting with
'MyFile'. One or more asterisk wild cards can be used in the file mask.
Can I import various data types at once?
Yes, if the file mask is set to *.*, all files of all known data types
will be imported automatically.
Toggle the Include Subdirectories flag on or off.
If you also like to include all sub-folders located in the source directory
for importing data, please check the checkbox.
Select the destination library, where files will
be imported.
Click the Import
button to start the import process.
Duration of import!
The import of files into a library may take minutes or even hours depending
on your hardware performance and the number of files to be applied. While
importing you cannot continue working with the software.
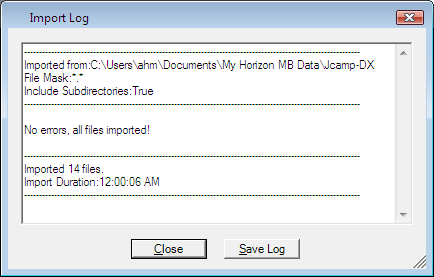
After completion of the file import, a report is shown
with the import results and details about errors. This report can be saved
or copied as text into the clipboard with CTRL-C
short hand.
Click the Close
button to finish or the Save
Log button to store the report.
The contents in the library explorer tree are updated
accordingly.
Analytical data located in a library are treated like data in projects.
To open e.g. a spectrum, simply double
click with the left
mouse button onto the desired item in the library tree.
The data object will be opened in the main workspace.
Any modification of the data object will be temporarily applied until
the user finally saves or discards these modifications.
Example:
If a spectrum is opened from a library and a normalization has been
carried out, the spectrum is marked modified. The user needs to save or close
the data window to finally apply these modifications. Only if the user
applies the modification, data will be permanently changed in the library.
Data, which is no longer required, e.g. because it is a duplicate of
another object or it has been replaced by a more reliable object, can
be easily removed from the library.
Expand the libraries
tree in the library
explorer until you see the node of the item you like to remove.
Select the item
to be deleted in the tree.
Press the DEL-key
and the object is removed without further confirmation.
To keep control and an overview over your data you have the opportunity
to temporarily remove or close libraries, which are no longer required
at the moment. In this case the library node will be no longer available
in the library explorer. But it does not
mean, the library has been physically deleted from your hard disk! You
can reopen it any time later on.
In the libraries tree
of the library explorer, select
the library node you like to remove.
From the Library
menu, select the Close command
or click theicon on top.