For data import into a library, some parameters must be adjusted. The
source directory and the data type as well as the destination library
must be specified in order to setup a batch import. After successful parameter
configuration all specified data will be imported from the source directory
into a give library one by one. Finally, an import protocol is displayed,
which holds the import statistics.
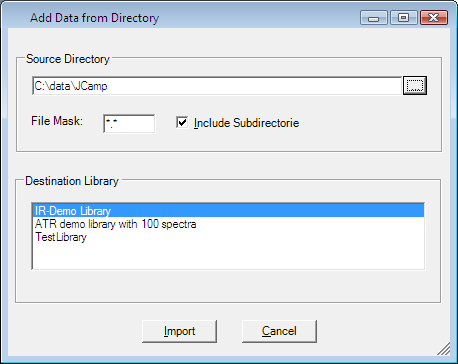
The dialog looks like this:
Directory import into library dialog contents
Source directory
Enter a source directory
Here the source directory location containing analytical data to be
imported into a library, must be specified. You can either enter the path
to the source directory directly into the text field, or you can choose
a path from your local hard disc or network neighbourhood using the
icon right from the text field.
Adjust the file mask
Here, the file mask of one file type or all file types can be entered
in the following scheme:
*.file extension for a particular
file typeor
*.* for all known
file types.
Include sub-directories
Data will be imported from a whole directory branch including all sub-directories
underneath a given source directory, if this flag is enabled.
Destination library
Select one of the libraries form the list, which is meant to be the
destination library for imported data.
Why are not all libraries shown here?
This selection just allows physical libraries,
but no virtual libraries.
Therefore directories, which will be used as libraries are not listed
here.