Online Software Help Manual

BookmarkIndexPrint
Contents
Display Legacy Contents

Set Visible Area

The set visible area command is used to quickly set the visible x-axis and y-axis range. The range needs to be manually entered in the range input dialog. The command is located in the 2D-View-Menu:


The set visible area command only affects the current 2D-object! If you want to open multiple objects in the same visible range, please use the Show Favorite Area command.

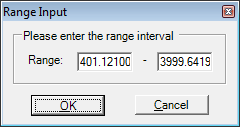
The range input dialog will be opened specifically for the chosen axis and looks like this:

To quickly access the range input dialog just doubleclick with the left mouse button into the lower/higher part of the desired axis or use the  right mouse button to access the 2D-View context menu!

The following picture depicts the axis-areas which are sensitive to the doubleclick range input:


Set visible area menu command

To set the visible area manually using the menu command, please follow the instructions below:

  1. Activate the desired 2D data view.

  2. From the 2D View menu, select the Set Visible Area menu and choose the axis from the submenu

    or


    use the Right-mouse button to access the 2D-View context menu.

  3. Enter the desired display range in to the Range Input Dialog.

  4. Press the Return-Key or click the OK-Button or Cancel-Button.

Set visible area doubleclick access

To set the visible area via doubleclick, please follow the instructions below:

  1. Activate the desired 2D data view.

  2. Doubleclick with the Left-mouse button on high/low area of the appropiate axis - see picture above.

  3. Enter the desired display range in to the Range Input Dialog.

  4. Press the Return-Key or click the OK-Button or Cancel-Button.

Set visible area keyboard shortcut

None.